

Granny squares… who doesn’t love them?
When I first learnt to crochet, this is the project I started off with and it’s the project I started my 12-year-old off on when she started crocheting last summer. They are a simple project but the perfect beginner!
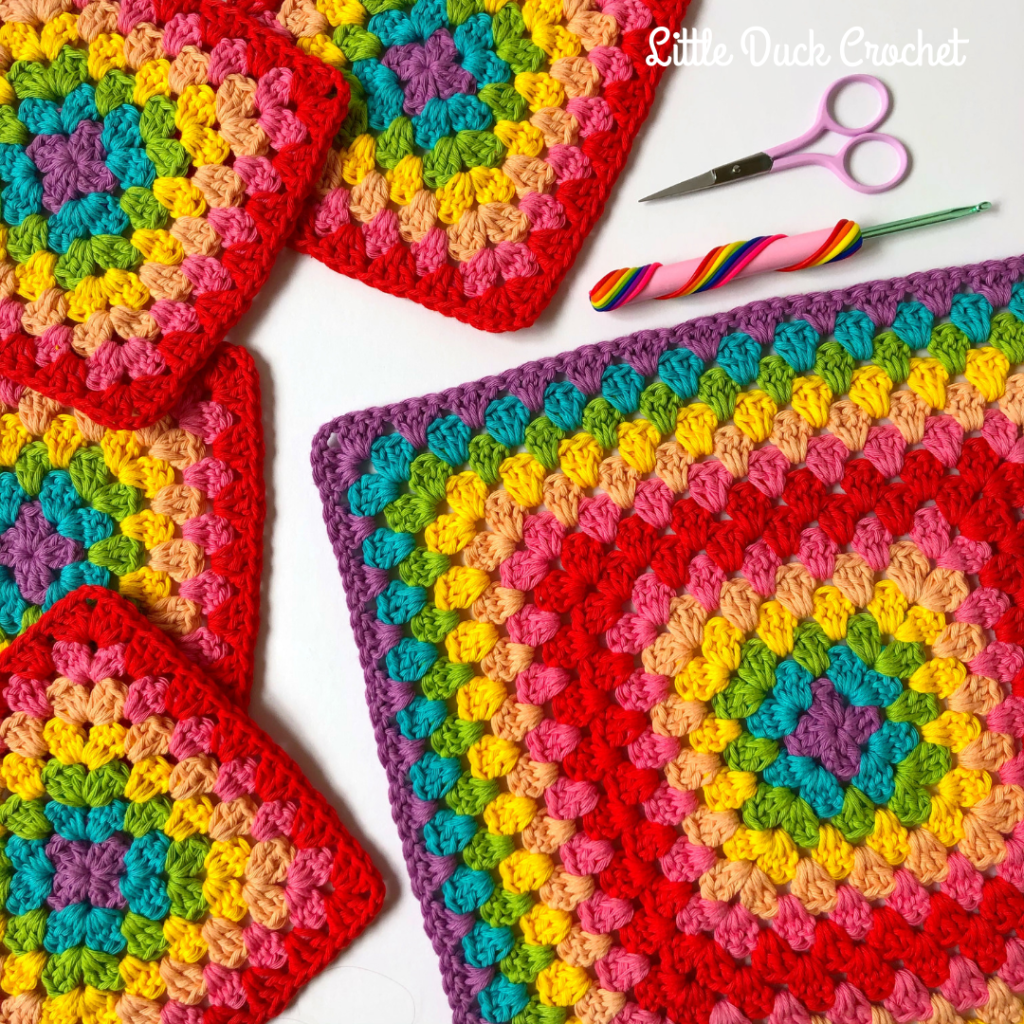
Now, it’s been a while since I had a good ol’ granny square on my hook and with Granny Square Day fast approaching, I decided to rectify that with a brand new project. There’s granny squares, there’s rainbows… what’s not to love?!
(If you haven’t heard about Granny Sqaure Day before – 15th August! – head over to Instagram! I love seeing so many beautiful grannies popping up all over my Insta feed, creating a beautiful virtual blanket.)
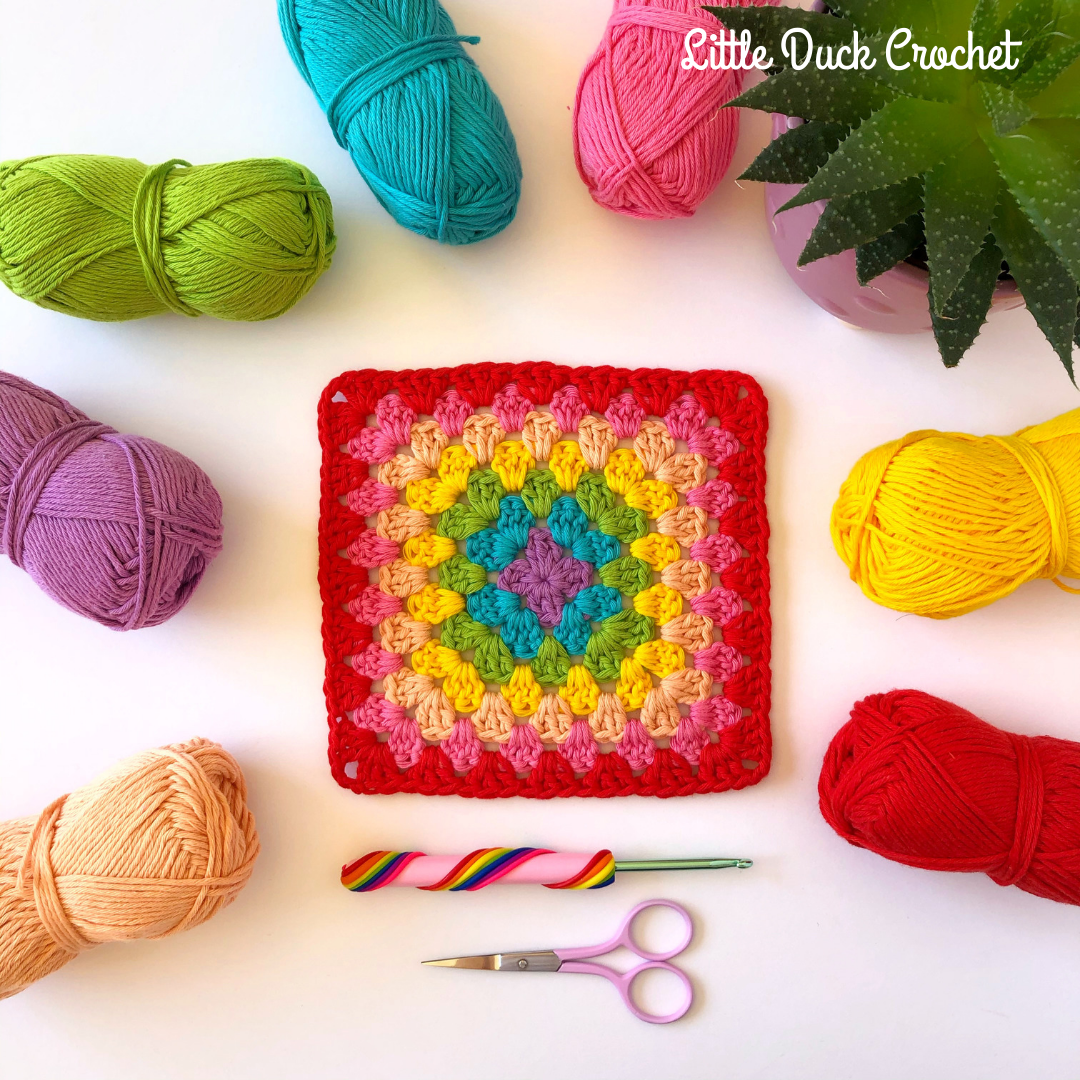
After some deliberation, I decided to whip up a new bag using the beautiful Cotton Aran from Paintbox Yarns. It’s a beautiful yarn to work with and comes in some seriously gorgeous colours! It’s quite a quick and easy project to complete and the bag is great for shopping or heading to the seaside – at the moment, mine is storing some yarn for a new design!
Materials
- Paintbox Cotton Aran in various shades – I used 1 ball each ofRose Red, Peach Orange, Bubblegum, Buttercup Yellow, Lime Green, Marine Blue and Tea Rose, plus 3 balls of Champagne White
- 4.5mm crochet hook
- Yarn needle
- Scissors
- To join my 4 grannies, I used this wonderful tutorial from The Patchwork Heart
Pattern Notes
- When I make my grannies, I turn after each row to avoid them going twisted. This method helps keep the sides nice and straight.
- The starting ch 3 counts as 1 dc.
- When working the bag strap, the starting ch 1 does not count as a stitch, it is just a turning chain and should not be worked in to.
Pattern:
Front of Bag
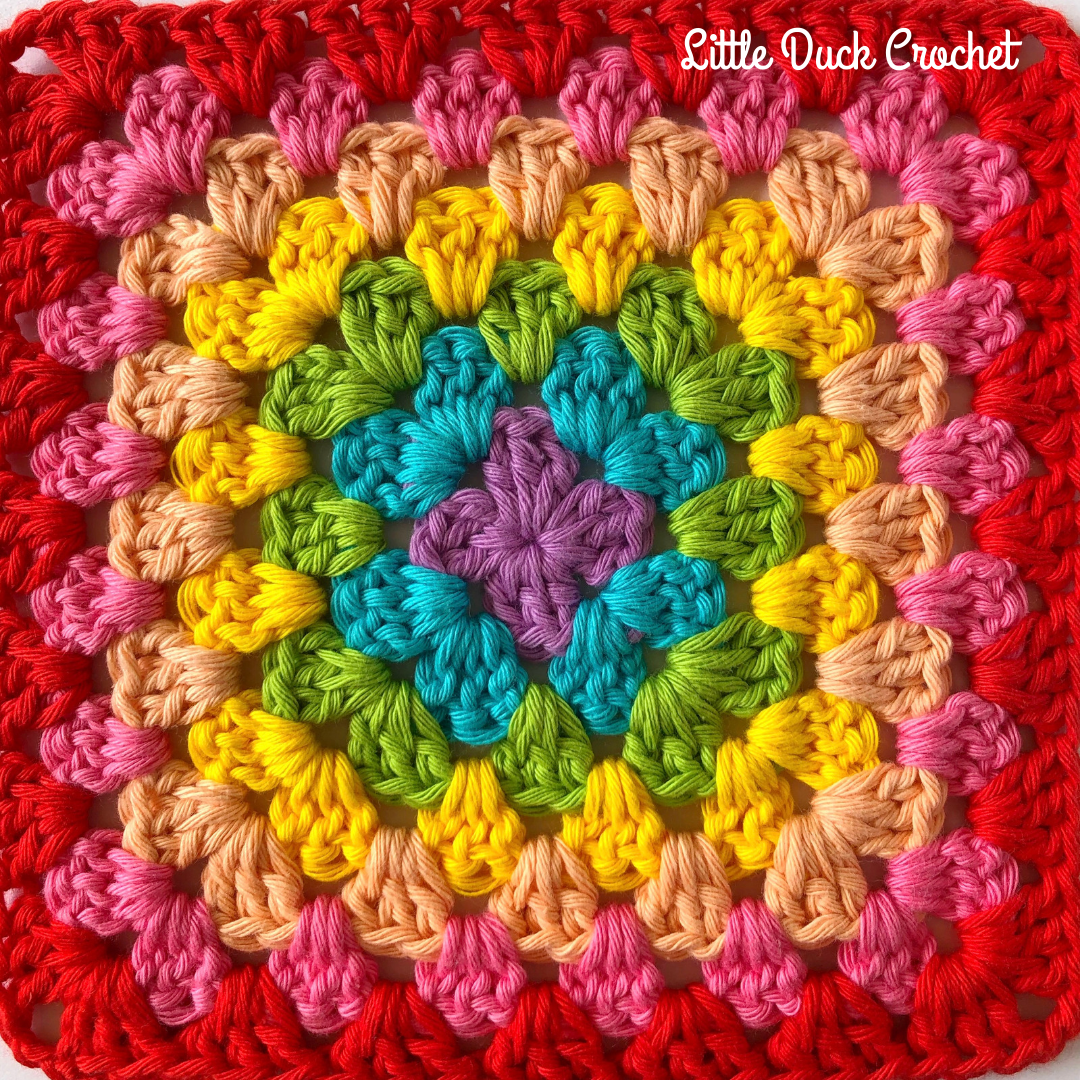
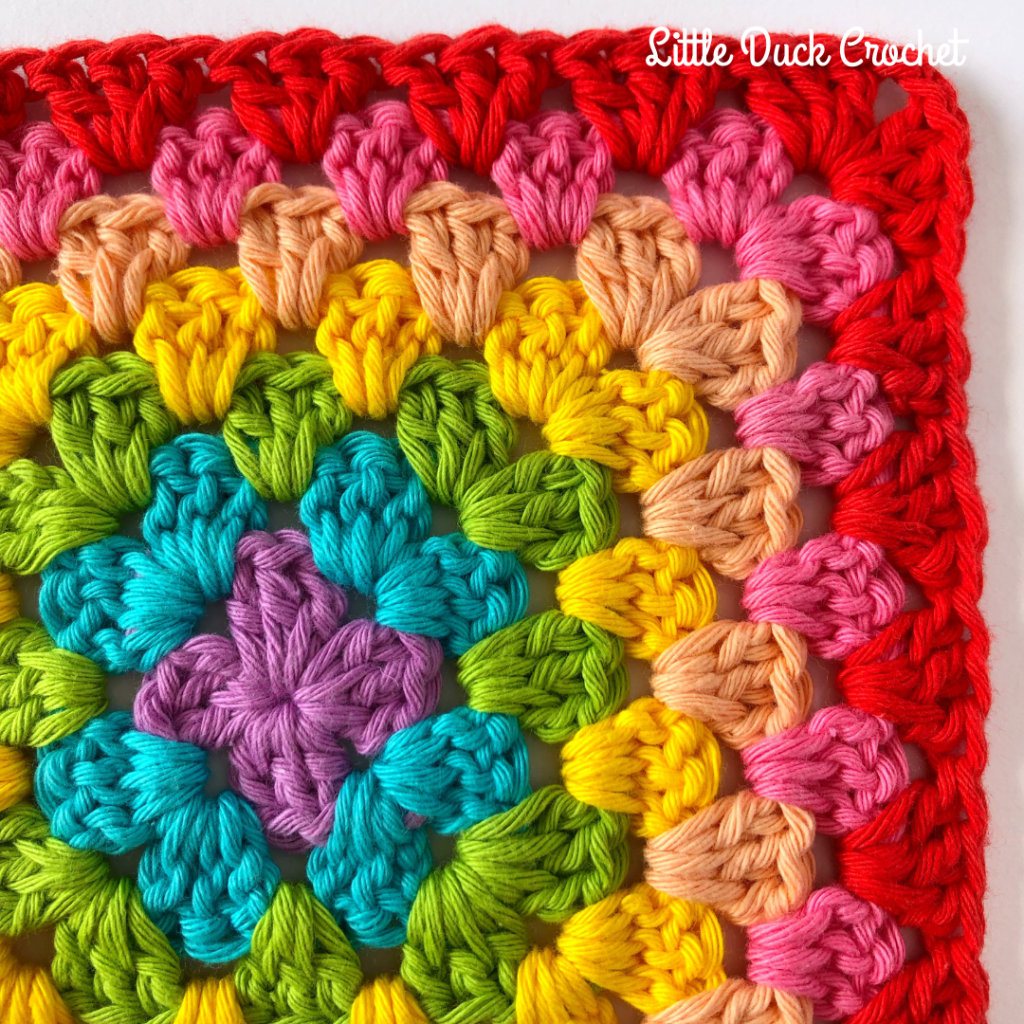
Make 4 7-round granny squares, weaving in all ends.

Using the continuous join as you go method, join your 4 grannies together, do not break yarn when you finish.
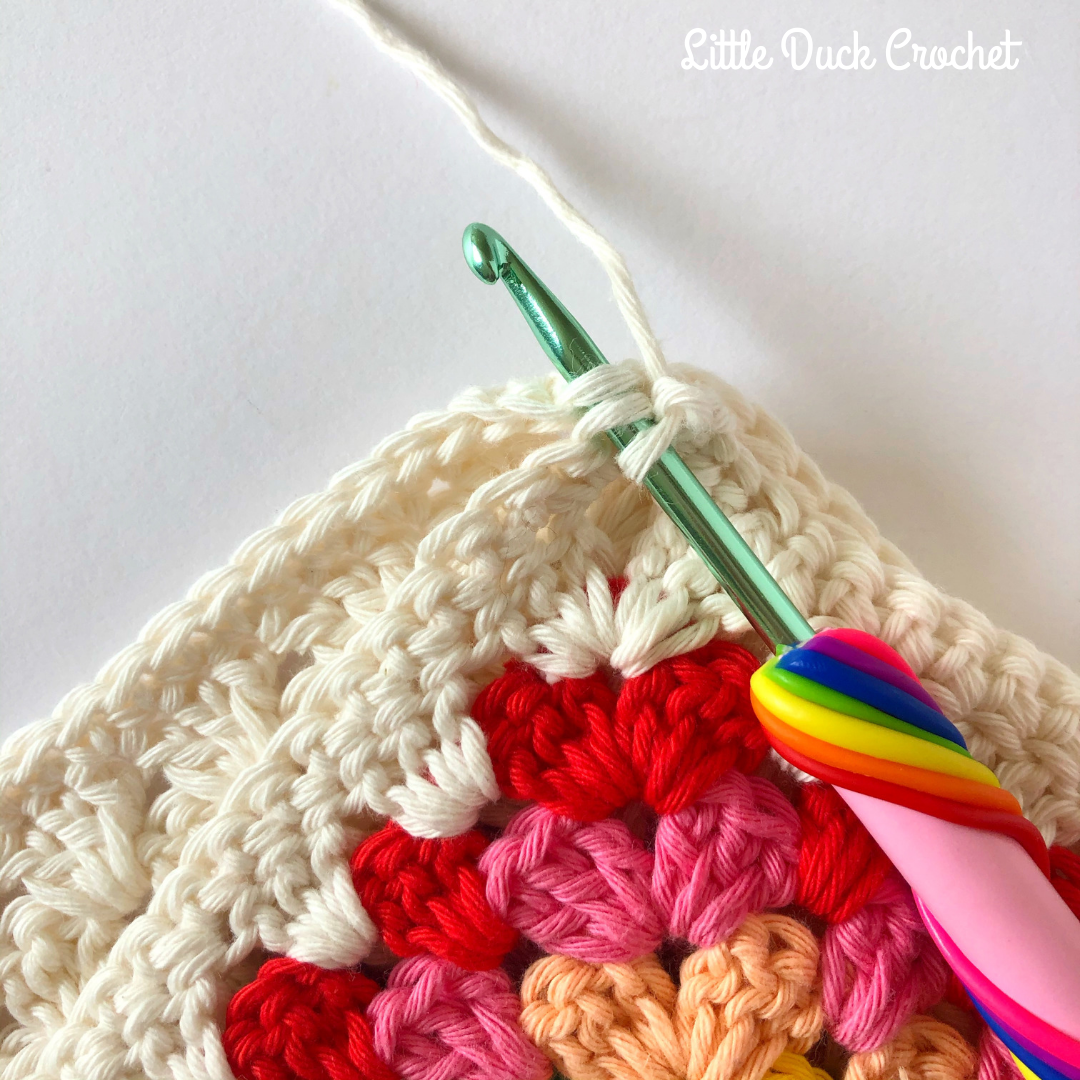
Ch 1, sc in first st and across edge until you get to one of the corner joins.
1 sc in ch sp, 1 sc2tog across the first and next ch sp – to do this insert hook in first ch sp, YO and pull up loop, insert hook into next ch sp, YO and pull up loops (you will have 3 loops on your hook), YO and pull through all 3 loops – , 1 sc in second ch sp
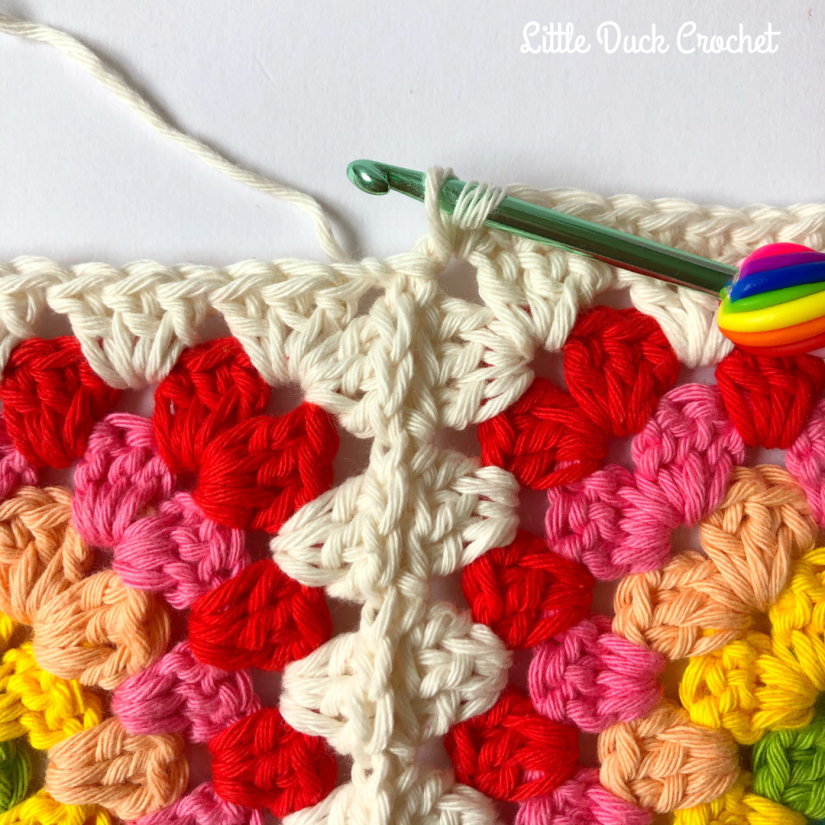

1 sc across edge until you get to the corner, [3 sc] in corner
Repeat the around the rest of the edge until you get back to the first sc made, sl st to join, break yarn and fasten off.
Back of Bag
Using the same granny square method as above, make a granny square of 17 rounds, do not break yarn when finished.
Ch 1, 1 sc in first st and around edge of back panel, crocheting [3 sc] in each corner.
Sl st in the top of first sc made, do not break yarn.
The panels should now be of equal size and will have the same number of stitches on the final round. If they aren’t you can give them a gentle block with a steam iron (use a stitch marker to save your stitch).
Joining
Placing both panels so WS is facing out, ch 1 and sl st through BLO. Don’t sl st too tight or you will find your bag will start to bunch up!
Continue like this along 3 edges of the bag until you get to the penultimate corner. Sl st to the middle sc of that corner, break yarn and fasten off.
Weave in the last of your ends.
Strap
The strap of the bag can be made as long or short as you want it to be. For my bag, I crocheted approximately 78 rows.
Row 1: Leaving a long tail to start (this will be used to join the strap to the bag), create a slip knot and chain 9, hdc in 3rd ch from hook and in each st to end, turn (7)

Row 2 Onwards: Ch 1, hdc in each st across row (7)
At the end of your last row, break yarn and fasten off leaving a long tail for joining.
Assembly
With your bag still inside out, count 3 stitches in from the join of both panels. Sew through the loops of the panel and strap with a whip stitch and then sew back, securely fasten off and weave in end.

Repeat this on the opposite site of your bag to finish.
Ta-da!

I really do hope you enjoyed this pattern. Don’t forget to share any makes with me over on Instagram using the tag #happyrainbowgrannybag !
* This post contains affiliate links.
© Copyright: This pattern and the photographs belong to Little Duck Crochet. Please do not copy, share, change, resell or forward the pattern in any way. I am happy for you to sell your finished item, a link back to my page would be lovely. Thank you.

A beautiful job. I missed the August Granny Square Day but I am a newbie at this tech stuff and will catch up.👵💕
LikeLiked by 1 person