

I often get asked how I make my granny squares. There are tons of various pattern available but I thought it was time to share how I make my grannies!
I always turn my granny squares after each round, I find this helps to keep them nice and straight, rather than squiffy!
All you need to create a classic granny square is a 4mm crochet hook and some DK yarn. You can, of course, use any other size hook and yarn but I do tend to use a 4mm hook when working with DK weight yarn.
The chain 3 at the beginning of each round counts as 1dc and you will need to slipstitch (ss) into the top of the starting ch3 to finish each round.
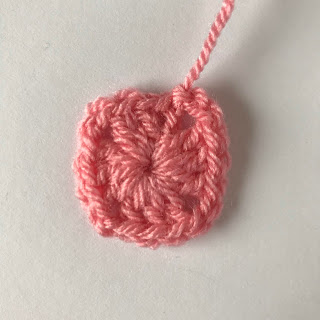
Round 1:
You need to begin with a slipknot on your hook, then chain 4. Insert your hook into the first chain you made, yarn over and pull the yarn through and slip stitch to create the centre of your granny square.


Chain 3. This will then act as the first double crochet. Then make 2dc in the centre. This counts as your first cluster. *Chain 2, 3dc*another 3 times, chain 2 and ss int he top of your starting ch3 to complete the first round.
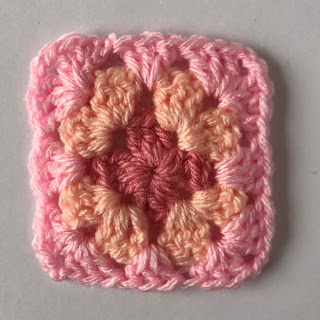
Round 2:
Now you need to turn your granny square over so that the wrong side is facing you. Join your yarn in any of the ch2 (theses are the corners) with a ss and ch3. 2dc, ch2, 3dc in the same ch2 sp, this then creates your first corner of round 2.
(3dc, ch2, 3dc) in each ch2 sp of the previous round until you get to your starting cluster, ss in the top of the starting ch3


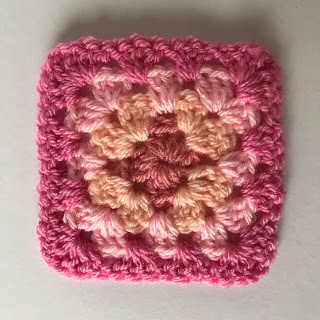
Round 3:
Turn your granny square over and join your yarn in any of the ch2 spaces from round 2 with a ss. Ch3, 2dc, ch2, 3dc in the same space to create your first corner.
You will now work in the gap between the 2 3dc clusters of the previous round. In between the 2 dc clusters, 3dc to create the side of your granny.
*(3dc, ch2, 3dc), 3dc* until you get to your starting cluster, ss in the top of the starting ch3.
Round 4
From here, you will be working pretty much the same as round 3, though you will need to crochet an extra dc cluster on the side.
Ch3, 2dc, ch2, 3dc in the same space to create your first corner.
You will now work in the gap between the 2 3dc clusters of the previous round. In between the 2 dc clusters, 3dc twice to create the side of your granny.
*(3dc, ch2, 3dc), 3dc, 3dc* until you get to your starting cluster, ss in the top of the starting ch3.
And this is your classic granny square!
You can keep going until your granny square reaches the size you want or, you can make lots of little grannies and join them together.
It really is one of my favourite patterns and a definite go-to for beginners, it’s a must for anyone starting out in crochet!

2 thoughts on “Granny Squares”