

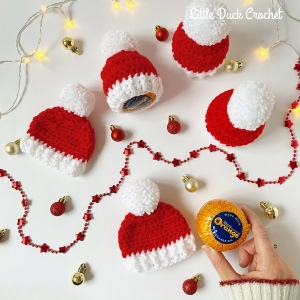
These super cute Santa hats chocolate orange cosies are the perfect gift for teacher, stocking fillers or decorating your Christmas Day table!
There’s nothing worse than your child suddenly surprising you with a teach gift request a mere week before the end of the school term. Even more so at Christmas when postal services are stretched to the limit and things more than likely now won’t arrive in time! (And why not throw a pandemic in for good measure!!)
You’d have thought I’d be prepared for this, however, as my daughter’s now in her second year of high school, I’d thought teacher gifts were long finished with.
Turns out… I was wrong!
Through most of primary, I made Aimee’s teacher gifts, there’s nothing better than receiving a handmade gift. Towards the end, these were the usually chocolate orange cosy’s, either as a Christmas pudding or an apple for the end of summer!
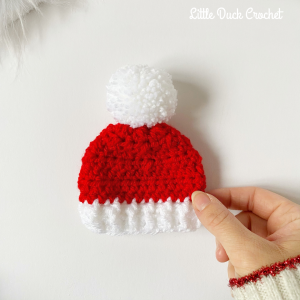
This year, Ames made a similar request but this year, I’ve taken inspiration from my recently released Winterberry Hat and created little mini Santa hat cosys!
These make wonderful little gifts, whether you want to stuff them in stockings or use them as a favour around the Christmas dinner table. The little hats fit snuggly round the chocolate orange (as long as you don’t get tempted and break in to it first! 😉).
They work up super quick and you don’t need a great deal of yarn! Perfect for stash busting!
Materials Needed
- Aran weight yarn – I used Paintbox Simply Aran in Paper White and Rose Red
- 4mm hook
- 4.5mm hook
- Pom Pom maker – I used a 45mm Clover pom pom maker
- Yarn needle
- Terry’s Chocolate Orange – these can be found in all good supermarkets

Pattern Notes
- The pattern is written in US terms – UK abbreviations can be found in the Stitches Required section below.
- You will need to use both a 4mm and 4.5mm hook, it will be noted in the pattern when you need to change hooks.
- The starting ch 2 is classed as a hdc through Rows 1 – 3 however the starting ch 1 does not count as a stitch.
- The hat is made up in a round, so you will be working on both the right side abs wrong side of the hat.
- Though this is worked in the round and turned after each row, do not turn your work after Row 3 only.
- Check the starting chain around the centre of the chocolate orange. If it’s too tight, try going up a hook size. Likewise, if it’s too loose, go down a hook size.
- Due to the small parts of the pom pom, these are not a toy and should not be given to young babies/children due to possible chocking hazards.
- Fphdc and bphdc are worked similar to the fpdc and bpdc, just by making a hdc instead.
- Hdc2tog (decreasing) – YO, insert hook into next st, YO and pull up a loop, you will have 3 loops on your hook, YO and insert into next hook, YO and pull up a loop, you will now have 5 loops on your hook, YO and pull through all 5 loops.
Stitches Used:
- Ch – Chain stitch
- Sl st – Slip stitch
- Hdc – Half double crochet (UK half treble)
- Fphdc – Front post half double crochet (UK raised half treble front)
- Bphdc – Back post half double crochet (UK raised half treble back)
- Hdc2tog – Half double crochet 2 together (UK half treble 2 together)
Pattern
Foundation chain: With Yarn A and a 4.5mm hook, ch 28, sl st in first chain made being careful not to twist the chain.
Row 1: Ch 2 (counts as 1 hdc here and throughout), 1 hdc in each ch to end, sl st in top of starting ch 2, turn (28)
Row 2: Ch 2, *fphdc, bphdc; rep from * until 1 st left, fphdc, sl st in top of starting ch 2, turn (28)
Row 3: Ch 2, *bphdc, fphdc; rep from * until 1 st left, bphdc, sl st in top of starting ch 2, break yarn and fasten off (28)
Row 4: Without turning your work and using a 4mm hook, join Yarn B with a sl st and ch 1 (does not count as a hex here and throughout), 1 hdc in each st until end, sl st in top of starting hdc, turn (28)

Rows 5 – 6: Ch 1, 1 hdc around to end, sl st in top of starting hdc, turn (28)
Row 7: Ch 1, *1 hdc in next 5 st, hdc2tog across next 2 st; 4 times to end, sl st in top of starting hdc, turn (24)
Row 8: Ch 1, *1 hdc in next 2 st, hdc2tog across next 2 st; 6 times to end, sl st in top of starting hdc, turn (18)
Row 9: Ch 1, *1 hdc in next st, hdc2tog across next 2 st; 6 times to end, sl st in top of starting hdc, turn (12)
Row 10: Ch 1, hdc2tog across next 2 st 6 times to end, sl st in top of starting hdc, break yarn and fasten off (6)
Close up the top of your little Santa hat with the tail, pulling it through the top with your yarn needle and weaving in all loose ends.

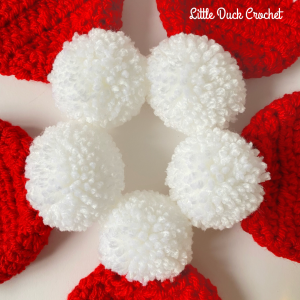
Using Yarn A and a pom pom maker, make a pom pom using a long strand of yarn to fasten it. Make sure you leave enough of a tail to attached your pom pom to your hat!
Trim your pom pom, being careful not to cut too much! Be careful of any pom pom fluff as you trim… it gets everywhere!
Using your yarn needle, attach the pom pom to the top of your hat, turning it inside out to fasten. Weave in your final ends and turn the right side out.

All that’s left to do now is pop your chocolate orange inside and your good to go! They take next to no time to make up, I may have got a bit distracted with the amount I’ve made so far!

Don’t forget, if you do make these to tag me in your photos on Instagram! I love seeing your makes, it means my ramblings make sense!
Happy crocheting! xox
* This post contains affiliate links.
© Copyright: This pattern and the photographs belong to Little Duck Crochet. Please do not copy, share, change, resell or forward the pattern in any way. I am happy for you to sell your finished item, a link back to my page would be lovely. Thank you.

Brilliant little gift idea 🎅🏻 Thank you 😊
Sent from my iPad
>
LikeLiked by 1 person
Thank you for this adorable pattern! What a fun little gift.
LikeLike